[Trade Journal]
Publication: American Electrician
New York, NY, United States
vol. 9, no. 6, p. 233-234, col. 1-3
INTERIOR WIRING
PRACTICAL INSTALLATION.
The previous articles in this series have been devoted to first principles almost exclusively. In the following sections it will be endeavored to set forth some of the practical difficulties encountered in interior wiring and the methods of obviating them.
Interior wiring can be divided into five different systems - cleat and knob, moulding, flexible conduit, brass-armored conduit and iron-armored conduit construction. These systems will be so discussed in the above order.
Cleat and knob construction is the cheapest of all methods, and is used in both concealed and open work. In concealed work no attention need be paid to symmetry of disposition of the wires, but extreme care must be paid to safety. The wire is strung from insulator to insulator in inaccessible places, and can never be examined or renewed without tearing down the walls which conceal it. In case an electric fire should start, it would be in the worst possible place in the walls of a lath and plaster constructionand it may be mentioned in passing that concealed cleat and knob work is never used for anything but lath and plaster work to any great extent.
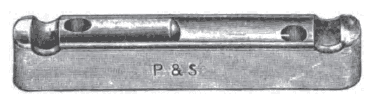 |
| Fig. 1. - Porcelain Cleat. |
The insulators should be of sound glazed porcelain not liable to crack under screw pressure. It is very poor economy indeed to buy poor porcelain, for the breakage wipes out the difference in cost, and the job when completed is very inferior. Cleats should be of a design such that the upper and lower cleats of a pair are exactly alike, thus doing away with the necessity of two different kinds of cleats, which would lead to annoying complications.
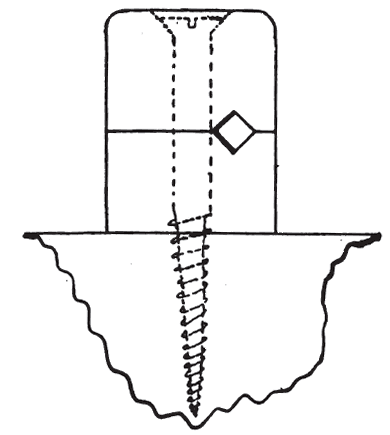 |
| Fig. 2. - Porcelain Knob. |
The knob insulators may be of the grooved pattern and the wire secured by tying. The writer, however, strongly recommends security insulators made in two parts, which by the pressure of the screw which holds the insulator in place, grasps the wire also. Such insulators as these as slightly more expensive, but the contractor must remember that labor is fully as expensive as material, and by a slight improvement in material the labor can be greatly abridged and a very much better job will result. Figs, 1 and 2 show a cleat and knob which are typical of those just mentioned, and are found very satisfactory.
The wire should be selected with reference to its mechanical strength of insulation. Rubber-covered wire is now insisted upon by the insurance rules, which prescribe such exacting tests that no other wire would fulfill the conditions. In the writer's opinion this insulation is altogether higher than necessary and the mechanical abrasion of the wire is a matter of very much more importance. To test a wire in this respect, take a piece of No. 14 and holding one end firmly, twist the other round and round until either the insulation or the wire gives way. The wire should break before the insulation.
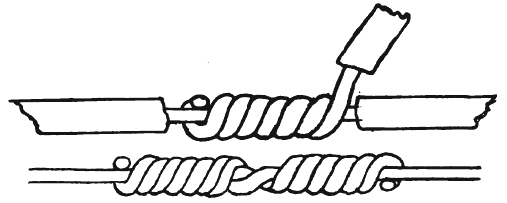 |
| Figs. 3 and 4. - Wire Joints. |
The joints in a good job of wiring should be only at the branch or top circuits. Where the distance between two points is to be spanned by a single wire, there should be no joints. Line joints are intended for pole or conduit work and have no business in an interior installation. A branch joint should be made as in Fig. 3. The insulation should be removed from the wire and the latter cleaned and scraped, and the end of the branch wire, similarly prepared, tightly wrapped about it with the aid of a pair of pliers. It should then be soldered securely.
Considerable discussion is rife as to the best flux to use in soldering. Acid has the advantage that the joint is almost sure to be thoroughly soldered, but the great disadvantage that surplus acid left on the joint will corrode it in time. Rosin, while it has no such corrosive influence, is not as reliable a flux, and the soldering has to be more carefully done.
For solid-core wires the writer favors acid. The completed joint should be thoroughly sponged off. The men should not be allowed to tape the joints until after they have been inspected by the foreman to see that the joint is solid and substantial and that every trace of acid has been removed. A convenient test is to rub the joint with the finger and apply to the tongue, for if acid is present it will be evident at once.
When flexible cables are used, especially if they consist of many fine wires, acid is not the proper thing to use as a flux in making soldered joints. The reason for this is that it permeates a cable in that part which is covered by insulation to the depth of an inch or so, and cannot be sponged out after the joint is complete. It will remain there until it has corroded the cable almost apart, when it is highly probable that a heavy current will complete the work and form an arc which will set the insulation on fire and possibly start a general conflagration. Rosin is the proper flux in a case like this, but it should be very carefully used or the joints will not be reliable.
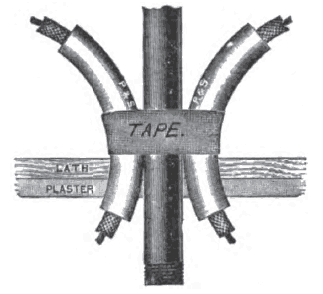
In taping a joint two layers of tape should be used; the first one of soft rubber which should be kneaded into an almost solid mass with the fingers, and the second of adhesive cloth tape. Insurance rules demand that the joint be covered with insulation equal to that of the wire, and unless these two layers of tape are carefully applied this condition will not be attained.
When the runs are very long from building to building, it may be that piecing will have to be resorted to, and in such cases the joint shown in Fig. 4 is usually employed.
In the case of flexible cable the strands are frayed and cut different lengths and hooked together, so that these hooks do not occur at a single point on the joint, making an unsightly bunch. The strands thus secured are tightly wrapped with copper wire, about No. 16 B. & S. The whole mass is then sweated into a solid lump with solder. The strands should be well turned before the joint is formed.
In cleat and knob work in new buildings it is common to run the wires in the walls with regard to convenience and minimum material, and this practice is entirely admissible, provided certain precautions are observed. Pipes carrying water or steam should be avoided. If possible the wire should run over a water pipe and under a steam pipe in order to best avoid the effects of a leak. The feeders and risers in a new building should be run in chutes from basement to top floor, which should be so built that the wires are easily removable. The architect should be consulted early in the day with regard to this matter, for by a little attention much time and money may be saved.
 |
| Fig. 5. - Wall Bushing. |
 |
| Fig. 6. - Wall Tube. |
Where the wires pass through beams or studding the hole should be bushed with porcelain tubing, and porcelain outlet tubes should be used wherever the wires emerge through lath or plaster, for this is a location at which grounds are of frequent occurrence. Figs. 5 and 6 illustrate how this should be done.
Where piping or brickwork is crossed, a flexible tubing of approved construction should reinforce the wire even though it does not touch the obstruction. To facilitate subsequent repairs, if any should be necessary, a penciled map of each circuit should be made with reference to easily located points, and accompanied by notes as to position among the studs or rafters. These sketches should be filed away with the other data concerning the contract, and may subsequently save a great deal of ripping out of l»lb and plaster.
Wherever the size of the wire is changed, there should be a fuse box, and for this reason the cabinet system is the most convenient for a job of concealed cleat work; otherwise the fuse boxes at the junction of the tap and feeder circuits must be brought out to an accessible position in order to permit the easy renewal of the fuse, and thus the fuse boxes would be liable to be in many inconvenient positions, and it would be impossible to locate them with any degree of accuracy except by strictly memorising the position of each one, or by making plans of the installation, as referred to in a preceding paragraph.
In the cabinet system the fuse boxes are altogether in one or more cabinets and suitably numbered; though a little more wire is used, the convenience due to this arrangement more than pays for the extra investment.
In open cleat work where everything is exposed, care must be paid to appearance. The wires should be strung straight and true and pulled as tight as whip cords and gripped by their insulators. The tap circuits should come out at right angles to the mains, and all short cut should be avoided for symmetry's sake. The fuse boxes in such a system as this may be located directly at the joints of the tap and main circuits on the ceiling of the room, if all of the work is in an accessible position, and the object of each fuse box is evident on inspection. Before a length of wire is run one end should be tied to some rigid support and three of four men should pull upon it by jerks until it is felt to give a little at each pull, when probably all of the kinks will be removed. This should be done after the cleats have been screwed in place, because once straightened the wires should be secured in place immediately before opportunity arises for them to get kinked again.
